Ansible 使用说明
说明
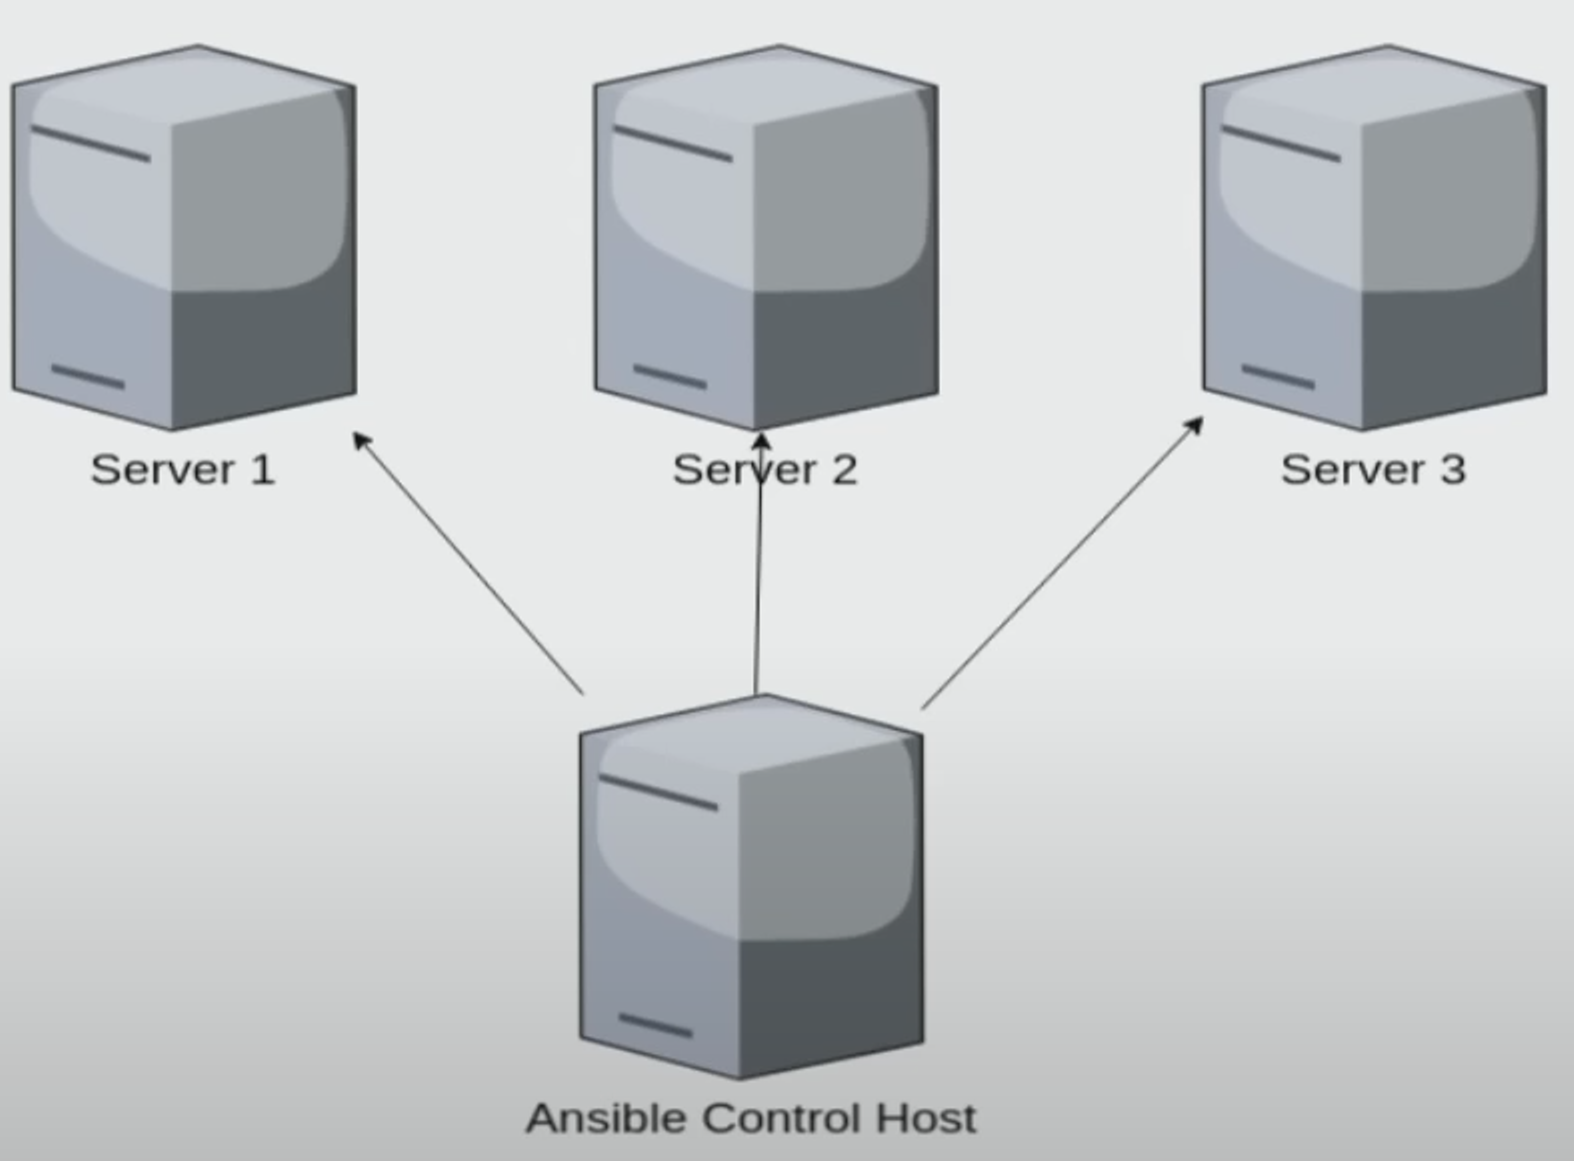
Ansible 主要通过 ssh 来控制多台机器配置管理,部署应用等,工作流如下
Ansible 与 k8s 可见 Ansible Vs. Kubernetes
- Ansible 没有状态的概念,只会根据设定的命令进行执行,直到完成或遇到错误退出
- k8s 维护了不同 pod 的状态,有一整套管理机制
The differences between these two products are profound. Ansible is an IT automation tool that deploys software, configures systems, and organizes more complex IT functions such as rolling updates or continuous deployments. On the other hand, Kubernetes is a system designed to orchestrate Docker containers. It manages workloads and uses nodes to handle scheduling to make sure that their condition matches the users’ expectations.
In other words, Ansible deploys changes to hosts, while Kubernetes manages containers and keeps them working properly.
Ansible is an excellent useful tool for front-end developers, particularly in situations where some programming is required. Kubernetes is best suited to developing larger apps.
Based on the properties of both tools, it’s like comparing apples to oranges. Granted, they’re both DevOps tools that handle configuration management, but the purposes for which they’re used have minimal overlap.
Ansible 与 salt 可见 Ansible vs. Salt: What you need to know 及 Ansible vs Salt – What’s the Difference? (Pros and Cons)
- Ansible 是 agentless,只需要在 master 安装相应的工具即可。salt 是 agent-based
- Ansible 只有一个 master。salt 可有多个,故障后自动换 master
Ansible 基础概念可见 Ansible concepts
安装
前置要求
- master 与 slave 都需要安装
openssh-server - master 与 slave 间配置了免密登录,可以设置两个 key,一个用于用户平常登录(可设置 passphrase),一个用户 Ansible 发布(不设置 passphrase),免密登录操作可见 ssh使用说明
- 测试容器可见: https://github.com/cv-programmer/ansible-learn
Ansible 安装
- master 机器:
pip install ansible,或者使用包管理工具安装,如 Ubuntu 下可使用apt install ansible - slave 机器不需要操作
简单使用
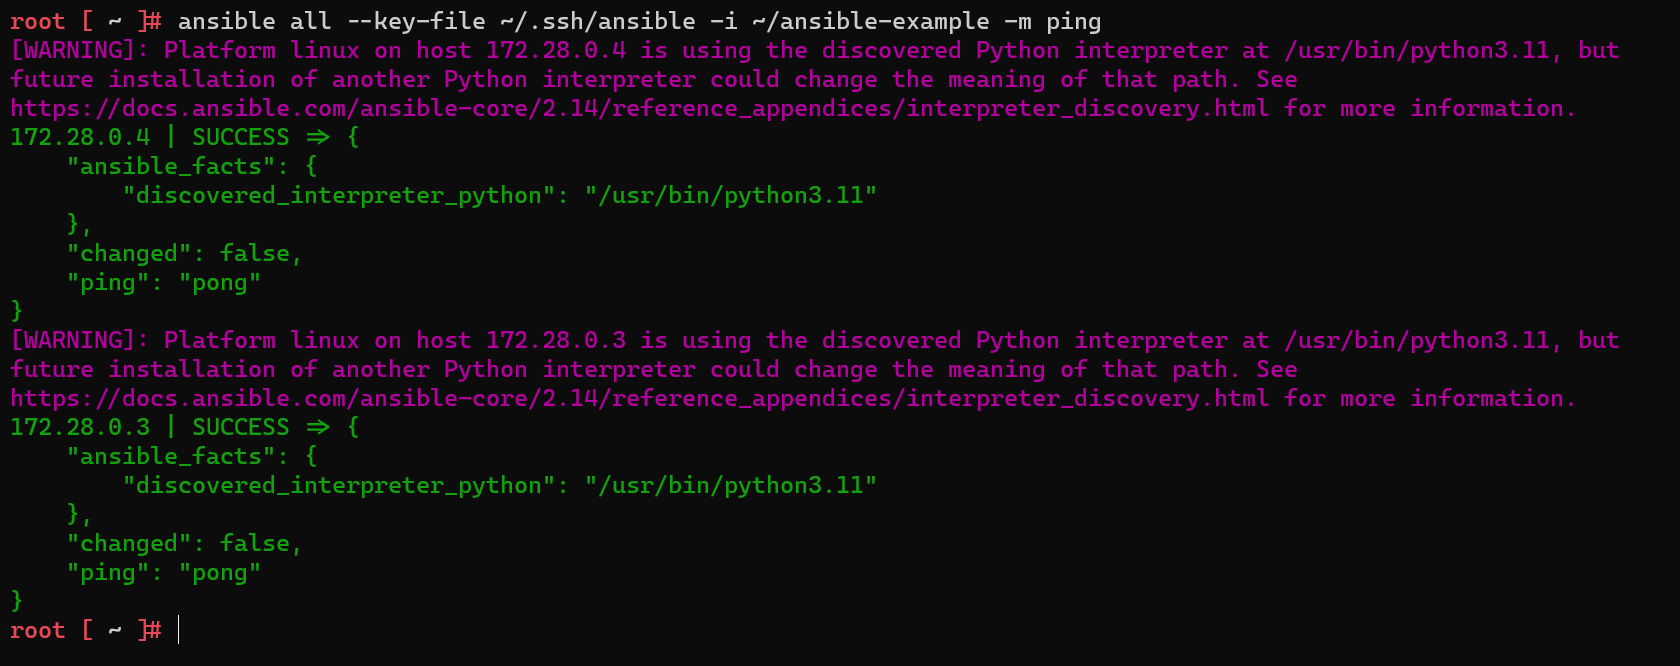
假设 master IP 为 172.28.0.2,并有两台 slave 机器,IP 分别为 172.28.0.3 和 172.28.0.4
设置的私钥为
~/.ssh/ansible编写 ansible inventory 文件
1
2
3
# ~/ansible-example
172.28.0.3
172.28.0.4在 master 机器执行以下命令,即可测试连通性
1
ansible all --key-file ~/.ssh/ansible -i ~/ansible-example -m ping
配置文件简化操作,通过在默认配置文件中设置,可以减少命令行输入,此时只需要输入
ansible all -m ping即可,可以加上interpreter_python = /usr/bin/python3.11解决告警1
2
3
4ansible.cfg
[defaults]
inventory = ansible-example
private_key_file = ~/.ssh/ansible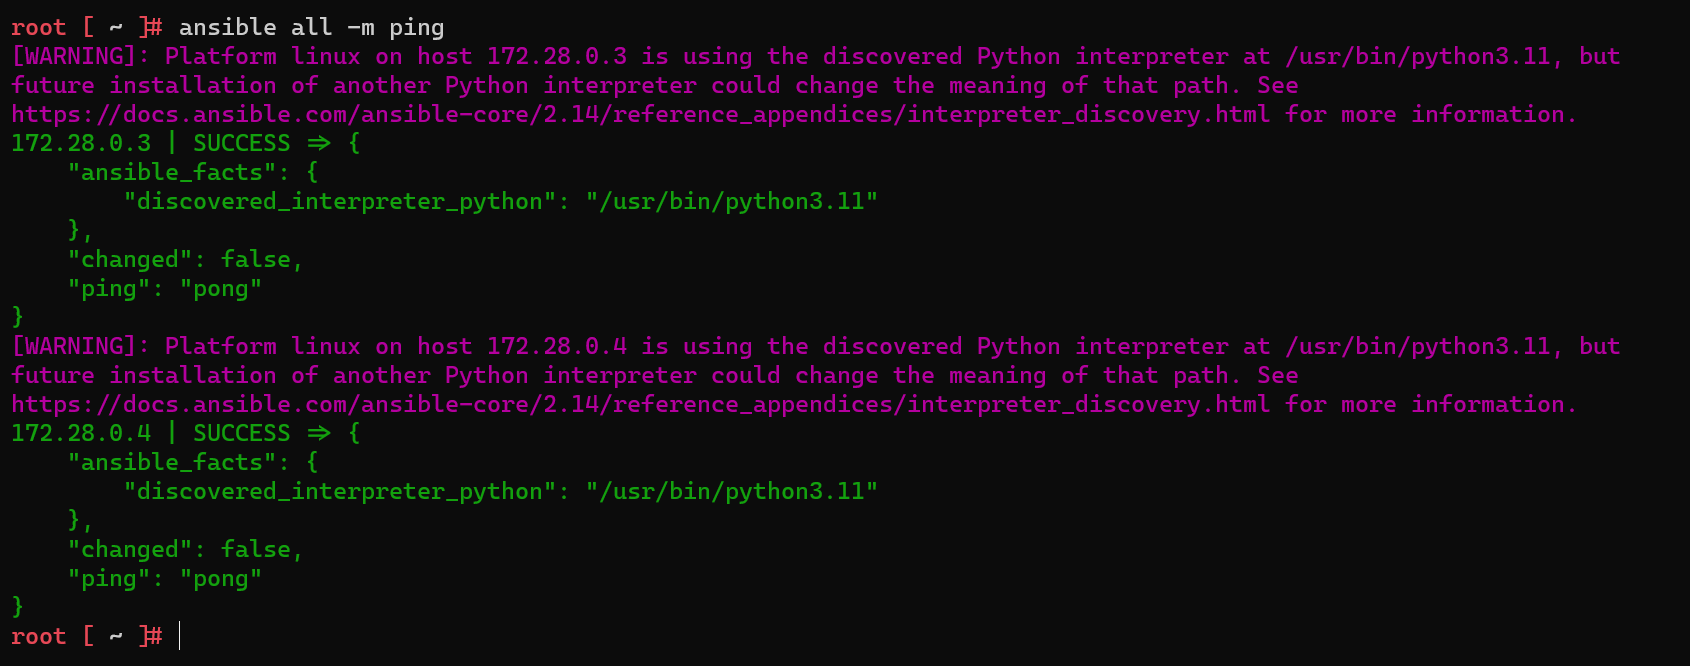
安装 git,
ansible all -m tdnf name=git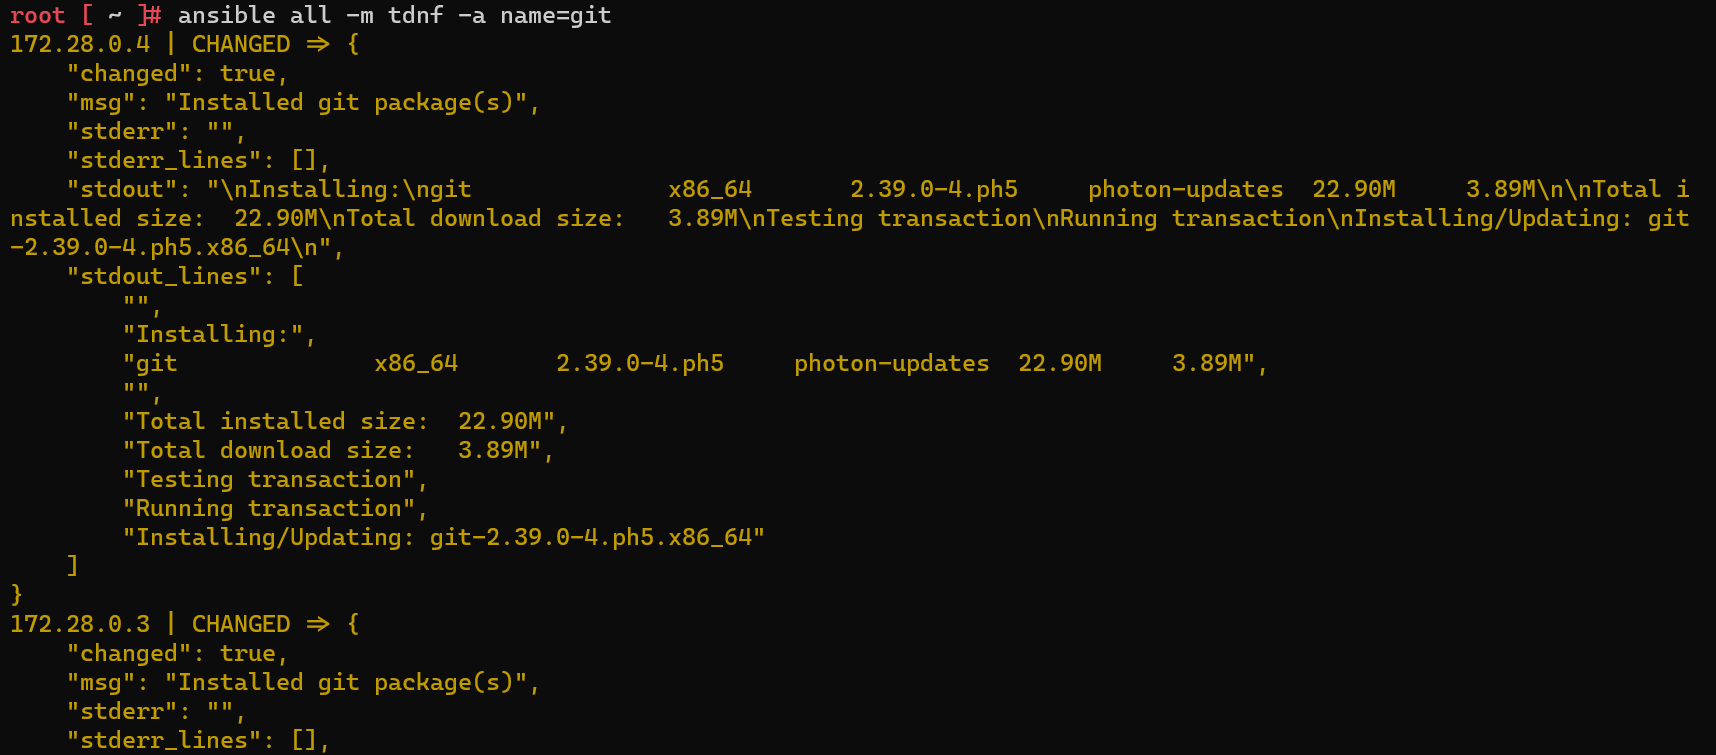
常用命令
- 检查连通性:
ansible all -m ping - 查看配置文件中的 slave:
ansible all --list-hosts - 查看连接 slave信息:
ansible all -m gather_facts,如果查看特定 host,后跟--limit [ip] - 安装软件:
ansible all -m [package-manager] name=[software]。其中package-manager是目标 Host 包管理工具,如果是 Ubuntu,则使用apt,Centos使用yum,photon使用tdnf- 如果权限不足,需要加上
--become --ask-become-pass
- 如果权限不足,需要加上
playbook
- 使用
yaml来定义一系列行为,简化操作成本
包管理
安装
如以下用来安装
git:ansible-playbook playbook.yml1
2
3
4
5
6# playbook.yml
- hosts: all
tasks:
- name: install package
tdnf:
name: git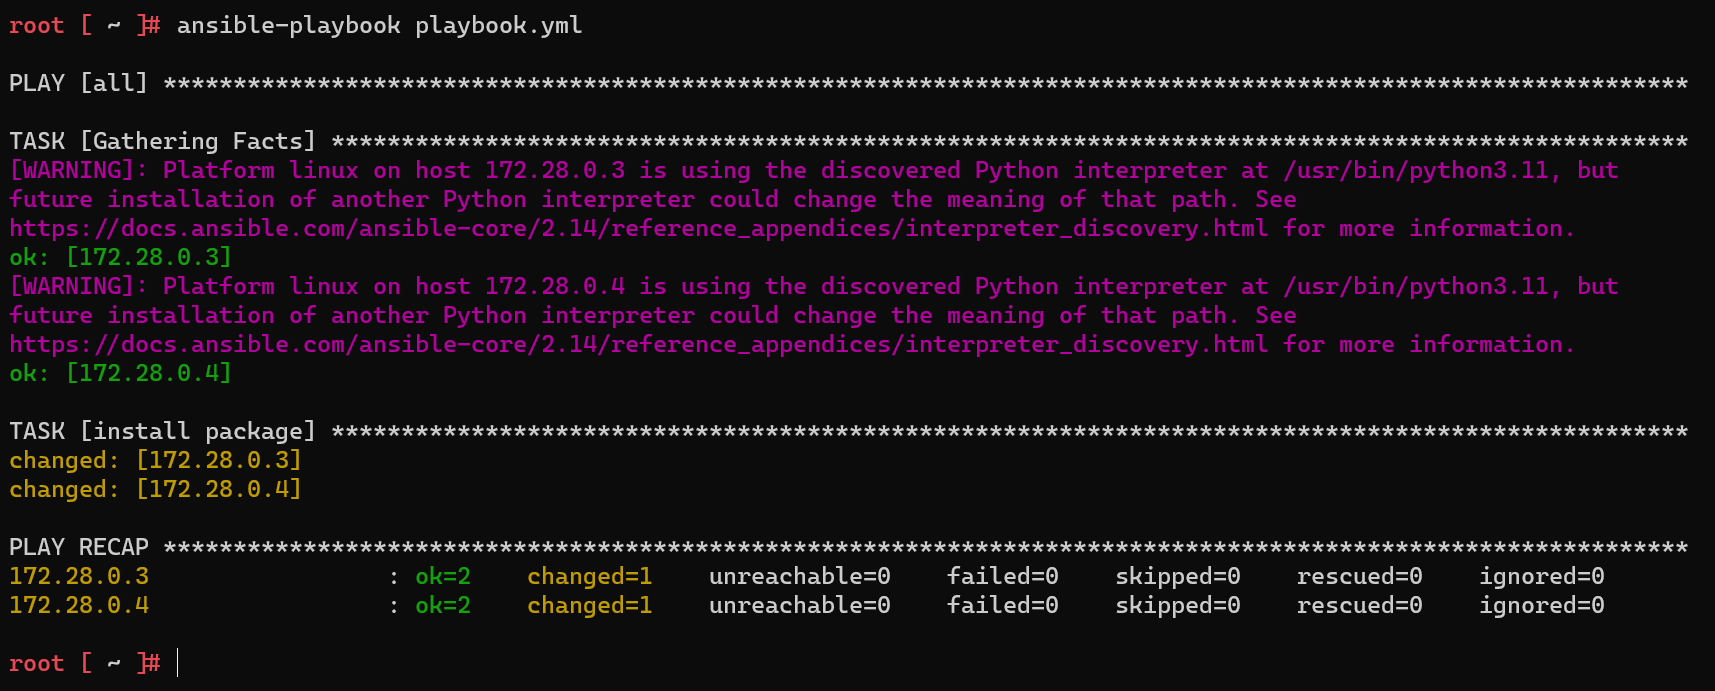
多次执行时,按理会变成 ignored = 1,但仍会出现
changed = 1,可通过以下方式来解决,即预先判断,再执行安装操作。可能原因如下,但暂未找到官方文档GPT: 当使用 Ansible 执行 tdnf 安装软件时,即使软件已经安装过,
changed值仍然可能显示为1。这是因为 tdnf 模块在每次运行时检查软件包的状态,并记录状态更改,而不考虑软件是否已经安装1
2
3
4
5
6
7
8
9
10
11
12
13
14# 示例运行,单软件包
- hosts: all
tasks:
- name: Check if package is installed
shell: tdnf info git
register: package_check
changed_when: false
failed_when: false
ignore_errors: true
- name: Install package
tdnf:
name: git
when: package_check.rc != 0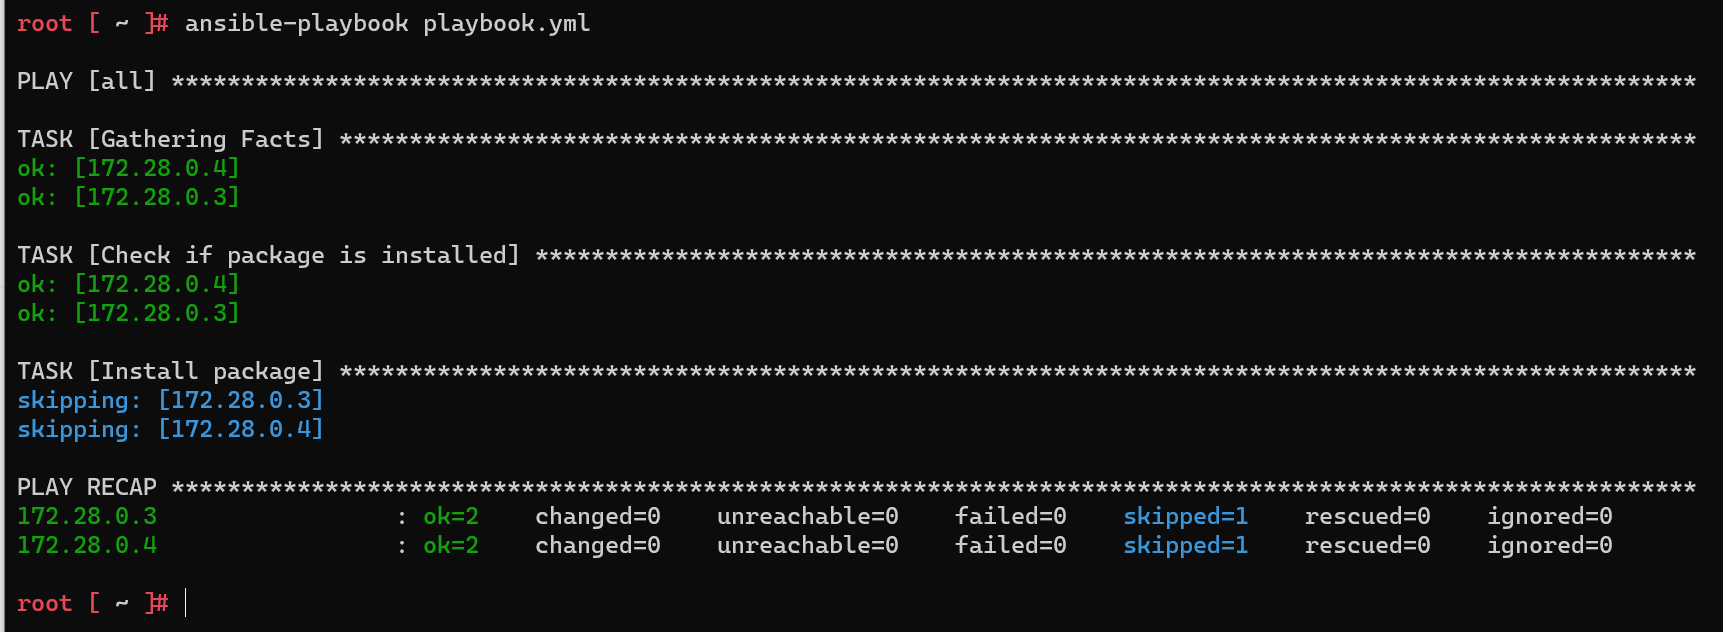
安装多个软件
1
2
3
4
5
6
7- hosts: all
tasks:
- name: install package
tdnf:
name:
- git
- tmux
卸载
1 | - hosts: all |
when
1 | - hosts: all |
当 slave 存在多种架构的机器时,使用同一个模块安装软件不可行,此时使用
when来区分不同的 task =>tdnf不支持when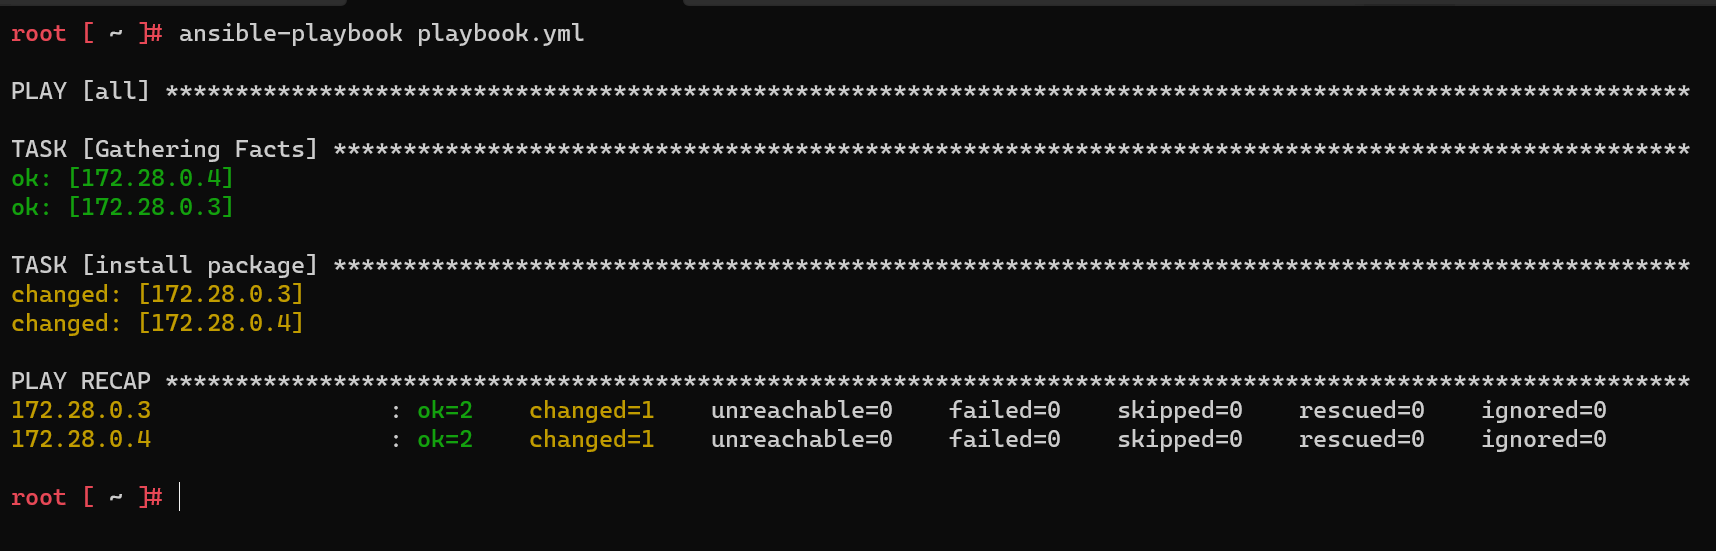
缩进错误时,如下
1
2
3
4
5
6- hosts: all
tasks:
- name: install package
tdnf:
name: git
when: ansible_distribution == 'VMware Photon OS'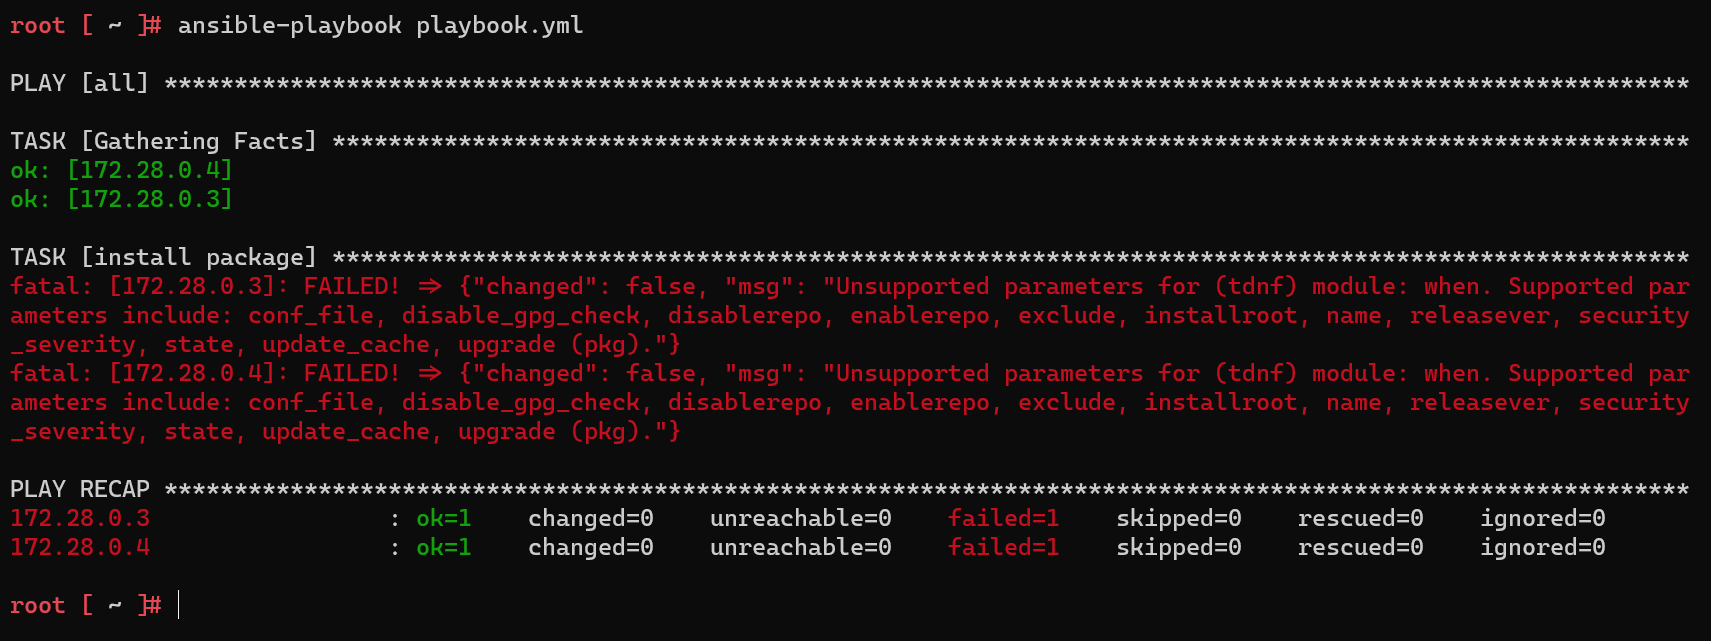
比如,slave 机器存在 centos 和 Ubuntu 时,
apt只适用于 Ubuntu,Centos 则需要使用 yum。可参见 Ansible - Only do action if on specific distribution (Debian, Ubuntu, CentOS or RHEL) or distribution version (ubuntu precise, ubuntu trusty)- 系统版本可通过
/etc/os-release中 ID 确定 - ansible_distribution 可通过
ansible all -m gather_facts --limit 172.28.0.3 | grep ansible_distribution
- 系统版本可通过
参数化
- 将不同系统的安装都汇总到一个 task 中,简化操作(name 使用变量是因为不同系统的叫法不同,比如 apache2 和 httpd)
1 | # playbook.yml |
分组 inventory
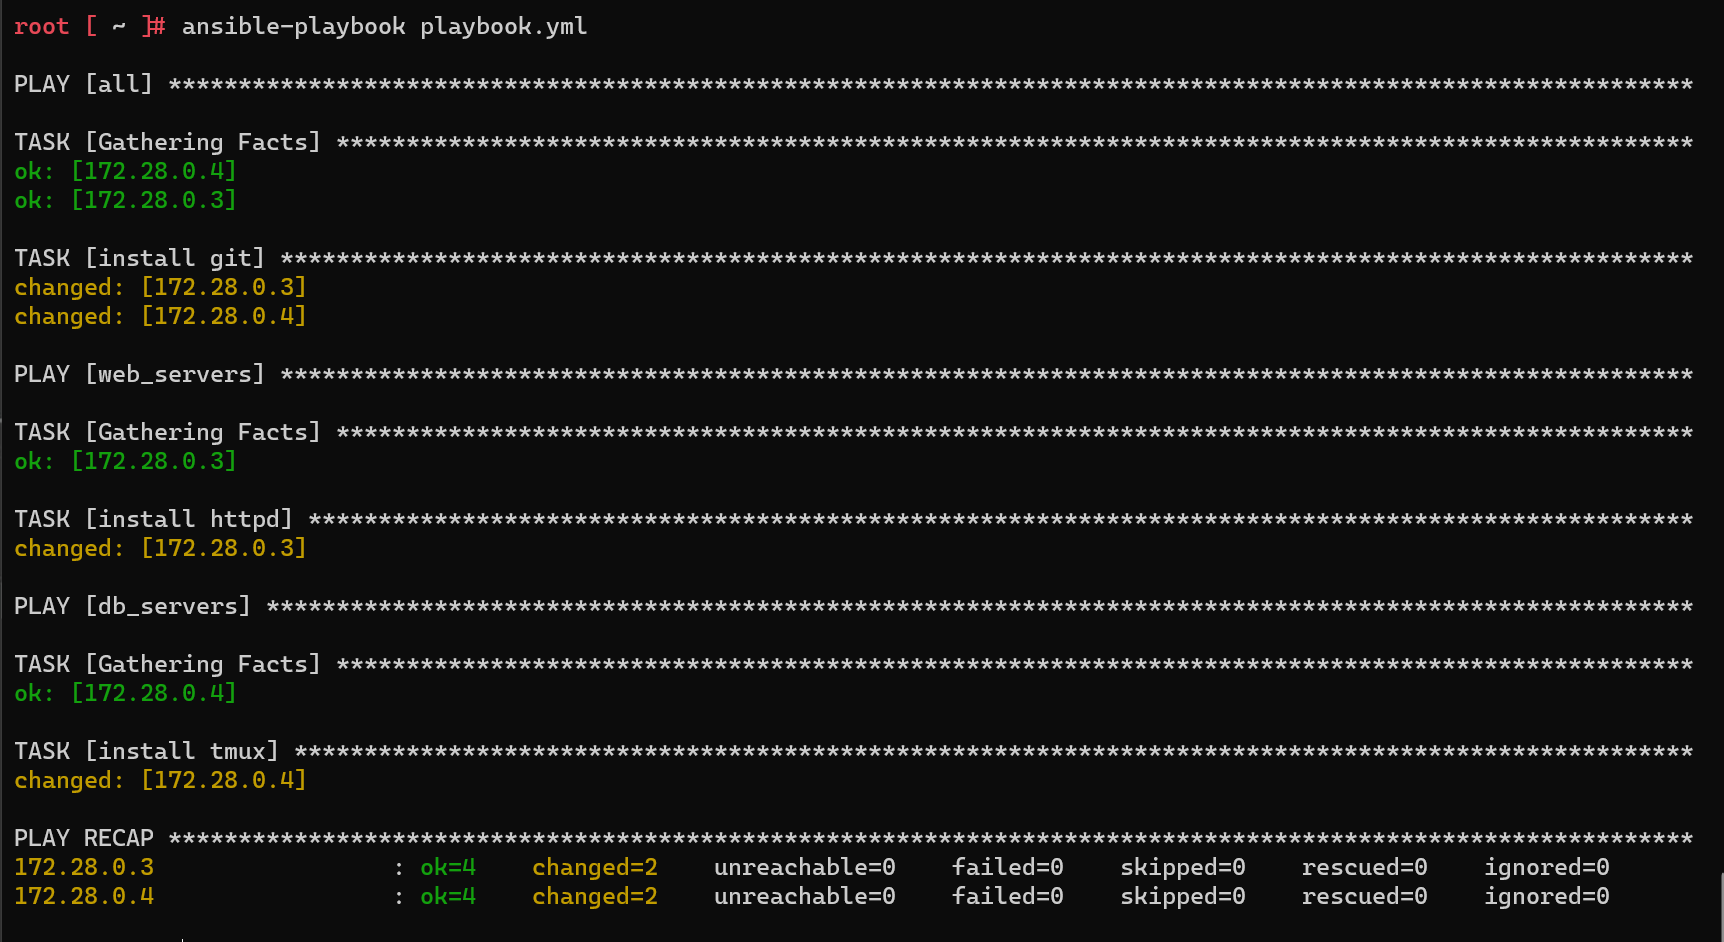
- 根据不同的作用,可以将 slave 机器进行分组,便于后续的管理,比如 webserver, db 等
1 | # playbook.yml |
标签化 tags
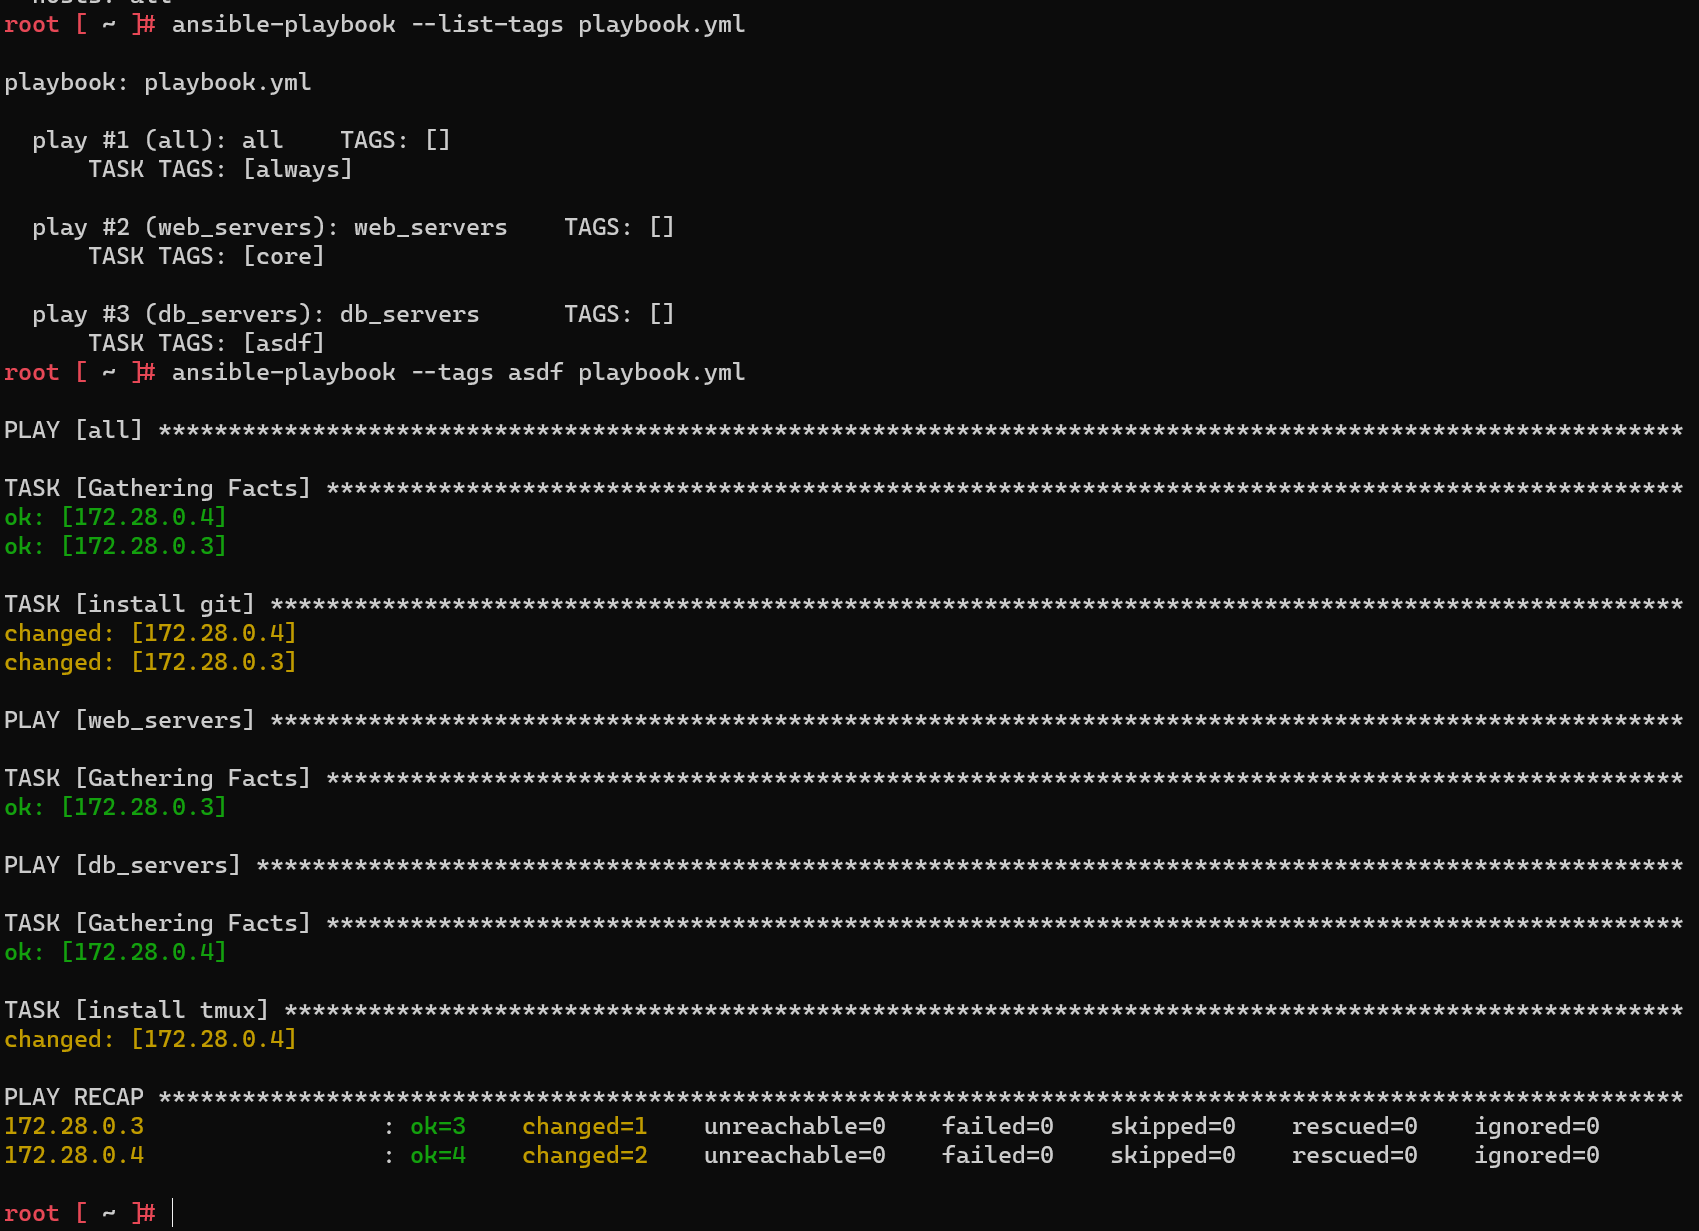
- 给 task 添加 tag,然后配合
ansible-playbook --tags [tag],即可执行对于 tag 的任务,多个 tag 使用--tags "aa,bb" ansible-playbook --list-tags可查看已配置的 tagalways为保留字,不指定时,也会执行
1 | # playbook.yml |
文件管理
本地文件 copy
- 通过 ansible 向 slave 下发文件,文件需要位于
playbook.yml同级目录files中(相对路径默认)=> 实际是与 task 同级 dest末尾不带/,即为复制过去后的名字,否则为路径
1 | # playbook.yml |
网络文件 + 解压 unarchive
1 | # playbook.yml |
服务管理 service
1 | # playbook.yml |
文件内容修改 lineinfile
1 | # playbook.yml |
用户管理
新增用户 user
1 | # playbook.yml |
用户权限 authorized_key
- photon 需手动安装 sudo:
tdnf install sudo - 使用前需安装:
ansible-galaxy collection install ansible.posix。见 ansible.posix.authorized_key module – Adds or removes an SSH authorized key
1 | # playbook.yml |
roles
与
files同级创建roles文件夹roles每个文件夹代表一个 role,里面定义每个 role 的 tasks,如roles/web_servers/tasks/*.yml代表 web_servers 所需要执行的任务tree
1
2
3
4
5
6
7
8
9
10
11
12
13
14
15
16.
├── ansible.cfg
├── inventory
├── playbook.yml
└── roles
├── base
│ └── tasks
│ └── main.yml
├── db_servers
│ └── tasks
│ └── main.yml
└── web_servers
├── files
│ └── a.txt
└── tasks
└── main.yml配置
1 | # playbook.yml |
host variables and handlers
host_vars
用来存放 slave host 配置信息的文件,即
inventory中 IP 中对应机器的特殊配置,如安装的包名等,本质就是 参数化tree
1
2
3
4
5
6
7
8
9
10
11
12
13
14
15
16
17
18
19.
├── ansible.cfg
├── host_vars
│ ├── 172.28.0.3.yml
│ └── 172.28.0.4.yml
├── inventory
├── playbook.yml
└── roles
├── base
│ └── tasks
│ └── main.yml
├── db_servers
│ └── tasks
│ └── main.yml
└── web_servers
├── files
│ └── a.txt
└── tasks
└── main.yml
handlers
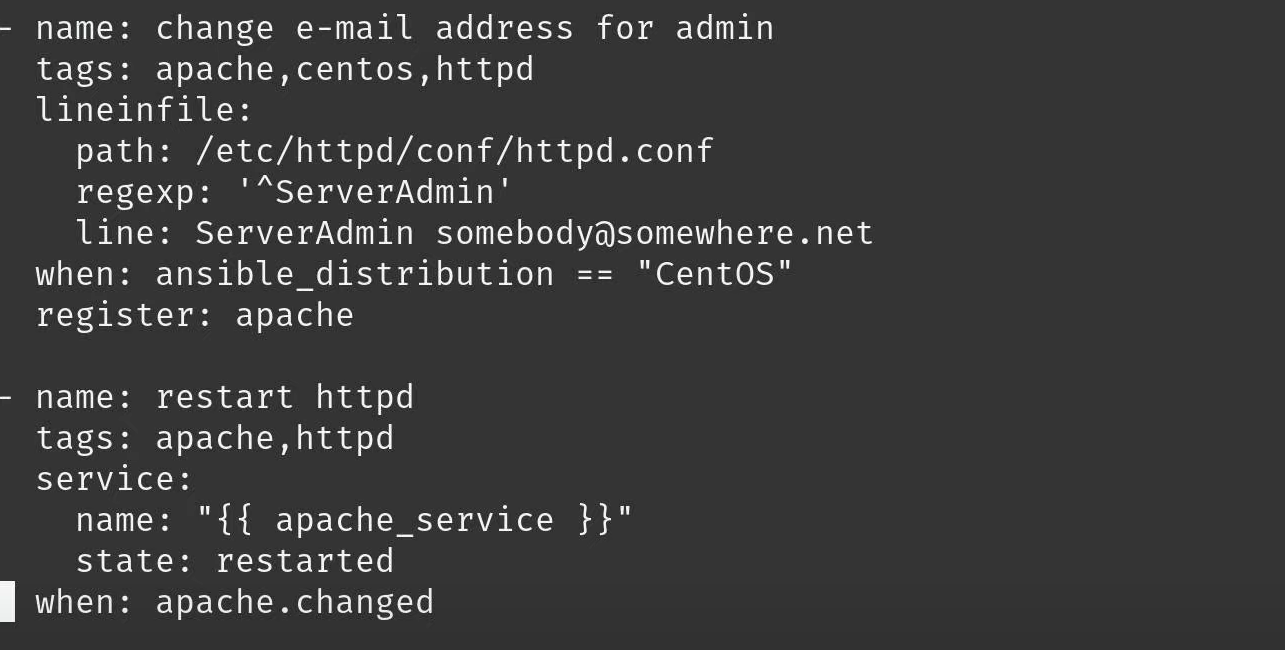
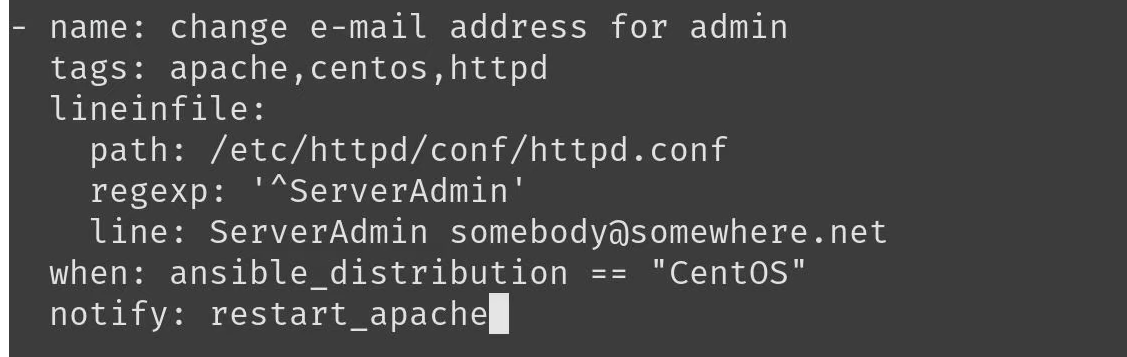
- register 配合 when 的优化,register 当有多个但是某个未变化时,when 中的 task 不会触发,而 handlers 是有变化即会触发任务

tree
1
2
3
4
5
6
7
8
9
10
11
12
13
14
15
16
17
18
19
20
21.
├── ansible.cfg
├── handlers
│ └── main.yml
├── host_vars
│ ├── 172.28.0.3.yml
│ └── 172.28.0.4.yml
├── inventory
├── playbook.yml
└── roles
├── base
│ └── tasks
│ └── main.yml
├── db_servers
│ └── tasks
│ └── main.yml
└── web_servers
├── files
│ └── a.txt
└── tasks
└── main.yml
template
与
roles/[role]/tasks同级别创建 templates 文件夹,用于存放模板文件。即*.j2文件如下表示将
sshd_config作为模板,保证在相同分发版本的不同 Linux 机器上配置保持一致。具体文件可见 ansible-learn/ansible-template配置模板
1
2# roles/base/templates/sshd_config_photon.j2
AllowUsers {{ ssh_user }}添加配置信息
1
2
3# host_vars/172.28.0.3.yml
ssh_user: "foo bar"
ssh_template_file: "sshd_config_photon.j2"添加 task,即指定从 template 生成文件
1
2
3
4
5
6
7
8
9
10# roles/base/tasks/main.yml
- name: generate sshd_config file from template
tags: ssh
template:
src: "{{ ssh_template_file }}"
dest: /etc/ssh/sshd_config
owner: root
group: root
mode: 0644
notify: restart_sshd添加 handlers
1
2
3
4
5# roles/base/handlers/main.yml
- name: restart_sshd
service:
name: sshd
state: restarted
未解决
- 目前 tdnf 安装软件时,不论是否已经安装过,都会返回 changed = 1,看着是与 ansible 还没有兼容好,毕竟官网教程都搜不到 tdnf。相关回答如下