supervisor使用说明
介绍
演示环境:
uname - a和lsb_release -a
以
apt安装为例,更多说明查看官网pip安装配置比较麻烦,建议用系统级安装方式安装路径:
/etc/supervisor
安装
安装
supervisor1
2sudo apt-get update
sudo apt-get install supervisor验证是否安装完成,输入
echo_supervisord_conf,有如下输入即说明安装成功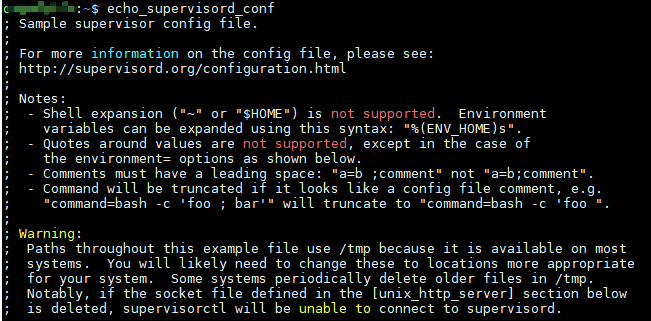
配置,生成默认配置文件
1
2
3
4
5
6
7
8
9
10
11
12
13
14
15
16
17
18
19
20
21
22
23
24
25
26
27
28
29
30
31
32
33
34
35
36
37
38
39创建配置文件夹,默认连/etc/supervisor都没有(这个可以先查一下,直接用pip安装没有)
sudo mkdir -p /etc/supervisor/conf.d
新建配置文件,官方做法 echo_supervisord_conf > /etc/supervisor/supervisord.conf 不推荐,太多不需要的
手动创建以下文件或路径,否则将会报错,无法正常使用
sudo mkdir /var/log/supervisor
修改配置文件
sudo vim /etc/supervisor/supervisord.conf
填入一下内容后保存退出
; supervisor config file
[unix_http_server]
file=/var/run/supervisor.sock ; (the path to the socket file)
chmod=0700 ; sockef file mode (default 0700)
[supervisord]
logfile=/var/log/supervisor/supervisord.log ; (main log file;default $CWD/supervisord.log)
pidfile=/var/run/supervisord.pid ; (supervisord pidfile;default supervisord.pid)
childlogdir=/var/log/supervisor ; ('AUTO' child log dir, default $TEMP)
; the below section must remain in the config file for RPC
; (supervisorctl/web interface) to work, additional interfaces may be
; added by defining them in separate rpcinterface: sections
[rpcinterface:supervisor]
supervisor.rpcinterface_factory = supervisor.rpcinterface:make_main_rpcinterface
[supervisorctl]
serverurl=unix:///var/run/supervisor.sock ; use a unix:// URL for a unix socket
; The [include] section can just contain the "files" setting. This
; setting can list multiple files (separated by whitespace or
; newlines). It can also contain wildcards. The filenames are
; interpreted as relative to this file. Included files *cannot*
; include files themselves.
[include]
files = /etc/supervisor/conf.d/*.conf执行配置文件:
sudo supervisord -c supervisord.conf,如果启动报错Error: Another program is already listening on a port that one of our HTTP servers is configured to use,使用如下方法解决1
2
3
4现在supervisord进程
ps -ef | grep supervisord
杀死进程
kill -s SIGTERM [进程号]
创建子进程配置文件,示例如下
1
2
3
4
5
6[program:Hello]
command=/usr/bin/python3 /opt/hello_test.py
autostart=true
autorestart=true
user=root
stopasgroup=true启动管控:
sudo supervisorctl update,完成
配置文件说明
主配置文件
1 | [unix_http_server] |
子进程配置文件
/etc/supervisor/conf.d/,子进程test.py为例,创建/etc/supervisor/conf.d/blog.conf1
2
3
4
5
6
7
8
9
10
11
12
13
14
15
16
17
18
19
20
21
22
23
24
25
26
27
28
29
30
31
32
33
34
35
36######################### 基本配置,配置后就可用 ##########################
项目名
[program:blog]
脚本目录(非必须)
directory=/opt/bin
脚本执行命令
command=/usr/bin/python /opt/bin/test.py
supervisor启动的时候是否随着同时启动,默认True
autostart=true
当程序exit的时候,这个program不会自动重启,默认unexpected,设置子进程挂掉后自动重启的情况,有三个选项,false,unexpected和true
如果为false的时候,无论什么情况下,都不会被重新启动,
如果为unexpected,只有当进程的退出码不在下面的exitcodes里面定义的
autorestart=true
脚本运行的用户身份
user=root
这个东西主要用于,supervisord管理的子进程,这个子进程本身还有子进程。
么我们如果仅仅干掉supervisord的子进程的话,子进程的子进程有可能会变
孤儿进程。所以咱们可以设置可个选项,把整个该子进程的整个进程组都干掉。设置为
true的话,一般killasgroup也会被设置为true。需要注意的是,该选项
送的是stop信号默认为false。非必须设置。
stopasgroup=true
######################### 额外配置 ##########################
这个选项是子进程启动多少秒之后,此时状态如果是running,则我们认为启动成功了。默认值为1
startsecs=1
日志输出
stderr_logfile=/tmp/blog_stderr.log
stdout_logfile=/tmp/blog_stdout.log
把stderr重定向到stdout,默认 false
redirect_stderr = true
stdout日志文件大小,默认 50MB
stdout_logfile_maxbytes = 20MB
stdout日志文件备份数
stdout_logfile_backups = 20
使用
supervisor重启
- 验证
supervisor是否挂掉:sudo supervisorctl,输入密码后发现执行失败,说明supervisor服务挂了
- 首先找到
supervisor安装的目录:whereis supervisor - 找到对应的
supervisor配置文件路径,如/etc/supervisor/supervisord.conf - 启动
supervisor服务:sudo supervisord -c /etc/supervisor/supervisord.conf - 查看
supervisor服务是否正常运行:sudo supervisorctl
supervisor进程管理
权限不够加
sudo,由配置文件中user身份决定也可以直接输入
supervisorctl进入supervisorctl的shell交互界面,此时上面的命令不带supervisorctl可直接使用
1
2
3
4
5
6
7
8
9
10
11
12# 查看所有进程的状态
supervisorctl status
# 启动进程
supervisorctl start [进程名]
# 停止进程
supervisorctl stop [进程名]
# 重启进程
supervisorctl restart [进程名]
# 配置文件修改后使用该命令加载新的配置
supervisorctl update
# 重新启动配置中的所有程序
supervisorctl reload
参考
本博客所有文章除特别声明外,均采用 CC BY-NC-SA 4.0 许可协议。转载请注明来自 cv-programmer!