【Linux】挂载新硬盘
前置知识
disk, drive and UUID
以下内容,均来自于参考1,整理格式,不翻译直接看
There are two colloquial uses of the term
diskordrivein play here- the first one refers to a physical device such as a usb stick. Device nodes like
/dev/sdarefer to the first sense (physical devices); - The second refers to a filesystem partition, of which there may be several on one physical device. Device nodes like
/dev/sda1refer to the second (filesystem partitions). - sda1 is a filesystem partition on physical disk sda. It is possible to format an entire device with one partition, but that is unusual, so in general,
/dev/sdawill never have a UUID.
- the first one refers to a physical device such as a usb stick. Device nodes like
Filesystem partitions have UUIDs, physical devices do not.
keep in mind the UUID is created when the partition is formatted. When you partition a disk (eg, with fdisk), you are not formatting anything, you are just setting the partition type (and size, etc) in the partition table, so the new unformatted partitions do not have a UUID.
查看UUID
sudo blkid
lsblk -f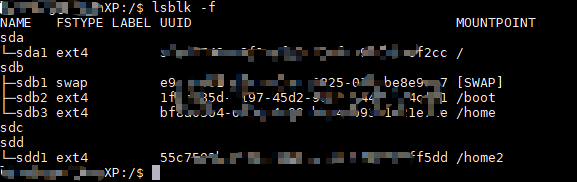
ll /dev/disk/by-uuid/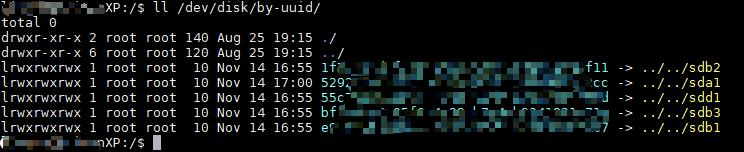
MBR and GPT
MBR- MBR分区表,即主引导记录
- 所支持的最大卷:2T,而且对分区有限制:最多4个主分区或3个主分区加一个扩展分区
GPT- GPT(即GUID分区表)
- 是源自EFI标准的一种较新的磁盘分区表结构的标准,是未来磁盘分区的主要形式
- 与MBR分区方式相比,具有如下优点
- 突破MBR 4个主分区限制,每个磁盘最多支持128个分区
- 支持大于2T的分区,最大卷可达18EB
- Linux中
fdisk分区工具支持MBR分区,parted支持MBR和GPT分区表
fdisk常用命令
1 | 权限不够加sudo |
parted常用命令
1 | 权限不够加sudo |
步骤
找到新加入的硬盘:
lsblk -f,由于新硬盘没有UUID,所以可以通过查看是否存在UUID来进行定位,如此处添加的硬盘是/dev/sdc将新添加的硬盘分区:
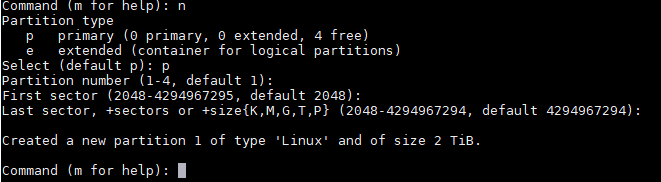
sudo fdisk /dev/sdc,图中红字因为磁盘太大有4T,因此需要先进行3,再添加分区当在linux中使用fdisk对大于2T的硬盘进行分区的时候,只能使用其中的2T,剩余的就无法分区挂载,可使用parted命令进行对2T以上硬盘进行分区: 参考4

分区大硬盘:
sudo parted /dev/sdc如果提示不存在,则先进行安装
sudo apt-get install parted,安装时如果出现下图红框错误,可以修改/etc/apt/sources.list,将https修改成http,然后执行sudo apt update,再次执行安装操作即可成功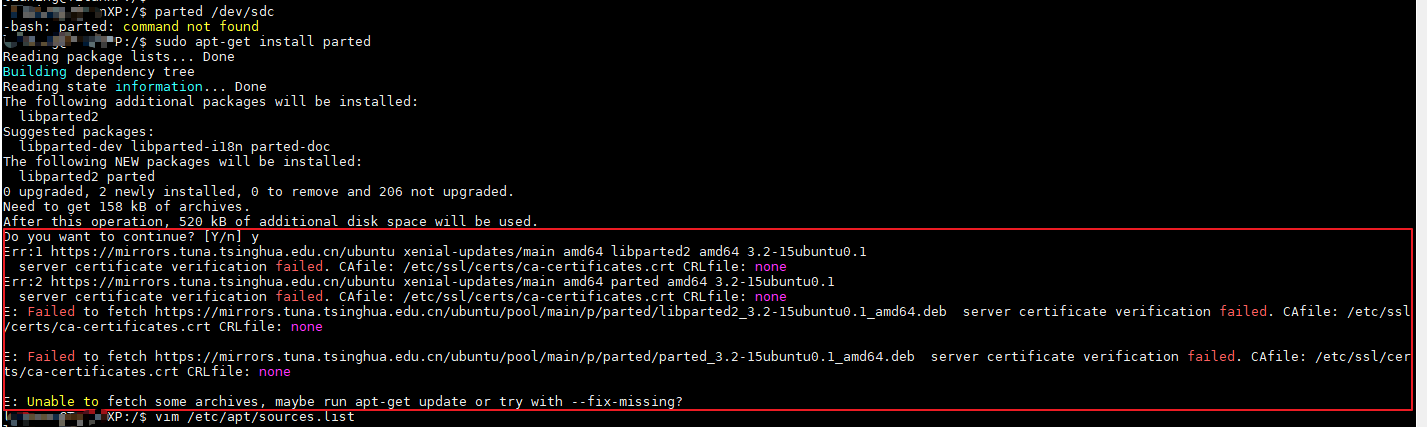
设置分区类型为gpt:
mklabel gpt(无事发生,可能是因为我的空白盘)和设置分区:mkpart,完成后q退出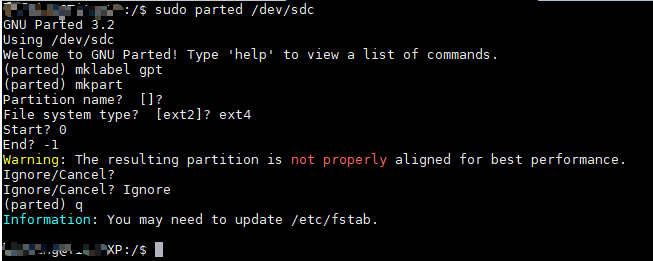
格式化分区:
sudo mkfs.ext4 -T largefile /dev/sdc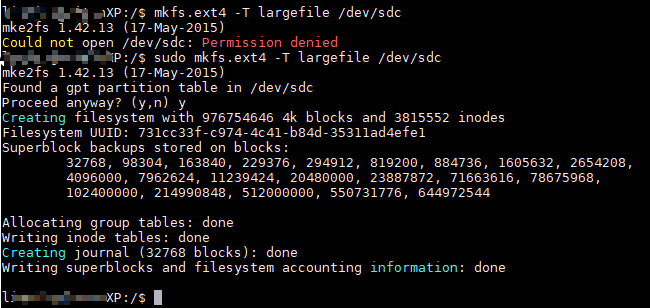
此时用
lsblk -f,已经可以看到UUID了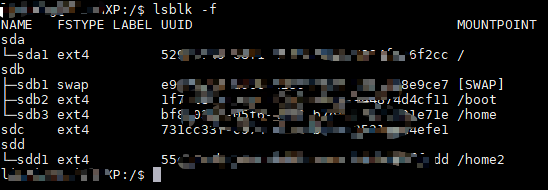
挂载分区
1
2
3
4
5
6
7创建挂载点,我这里挂载到/home3下面
sudo mkdir /home3
设置自动挂载,sudo mount /dev/sdc /home3这种方式在重启后会取消挂载
sudo vim /etc/fstab
根据格式添加内容
<file system> <mount point> <type> <options> <dump> <pass>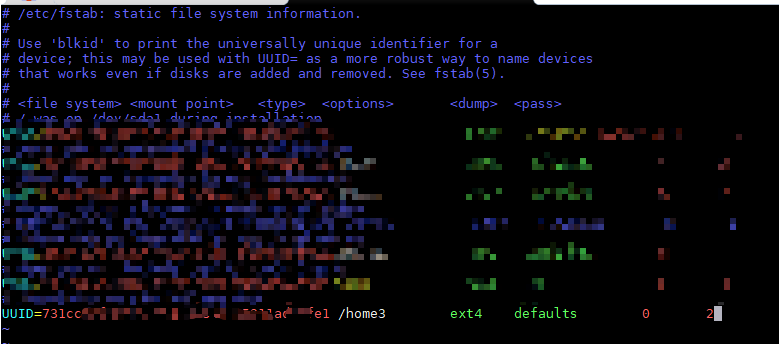
重新加载配置:
mount -a,重新查看lsblk发现已经挂载成功
卸载硬盘:
umount /dev/sdc
附
超过2T的大硬盘使用
fdisk进行分区,结果如下